Objective
In my previous post, I implemented several logical servers on my Proxmox home server machine:
“templ-ubuntu”, “demo-LinuxMint”, “home-devdepserver”, and “home-utilityserver”.
See Architecture of my home server
.
I now want to develop an initial demonstration web application in Golang with a SQLite database,
using the central repository for source code storage.
The application then needs to be delivered as OCI container and stored in the central binary registry.
Next, an application execution server environment needs to be created on my home server.
The created containerized application and database needs to be deployed to this server environment.
For this, I’ll install “home-testappserver”, and “home-prodappserver” as logical servers.
Finally, I want to make this deployed web application publicly accessible via tunneling.
The application should be accessible via a link in the “Demo” page of my Cloudflare website.
In this post, I want to complete my “virtual data center” with communication middleware for this.
Cleaning up existing “home-pve” and “home-backupserver” will follow later.
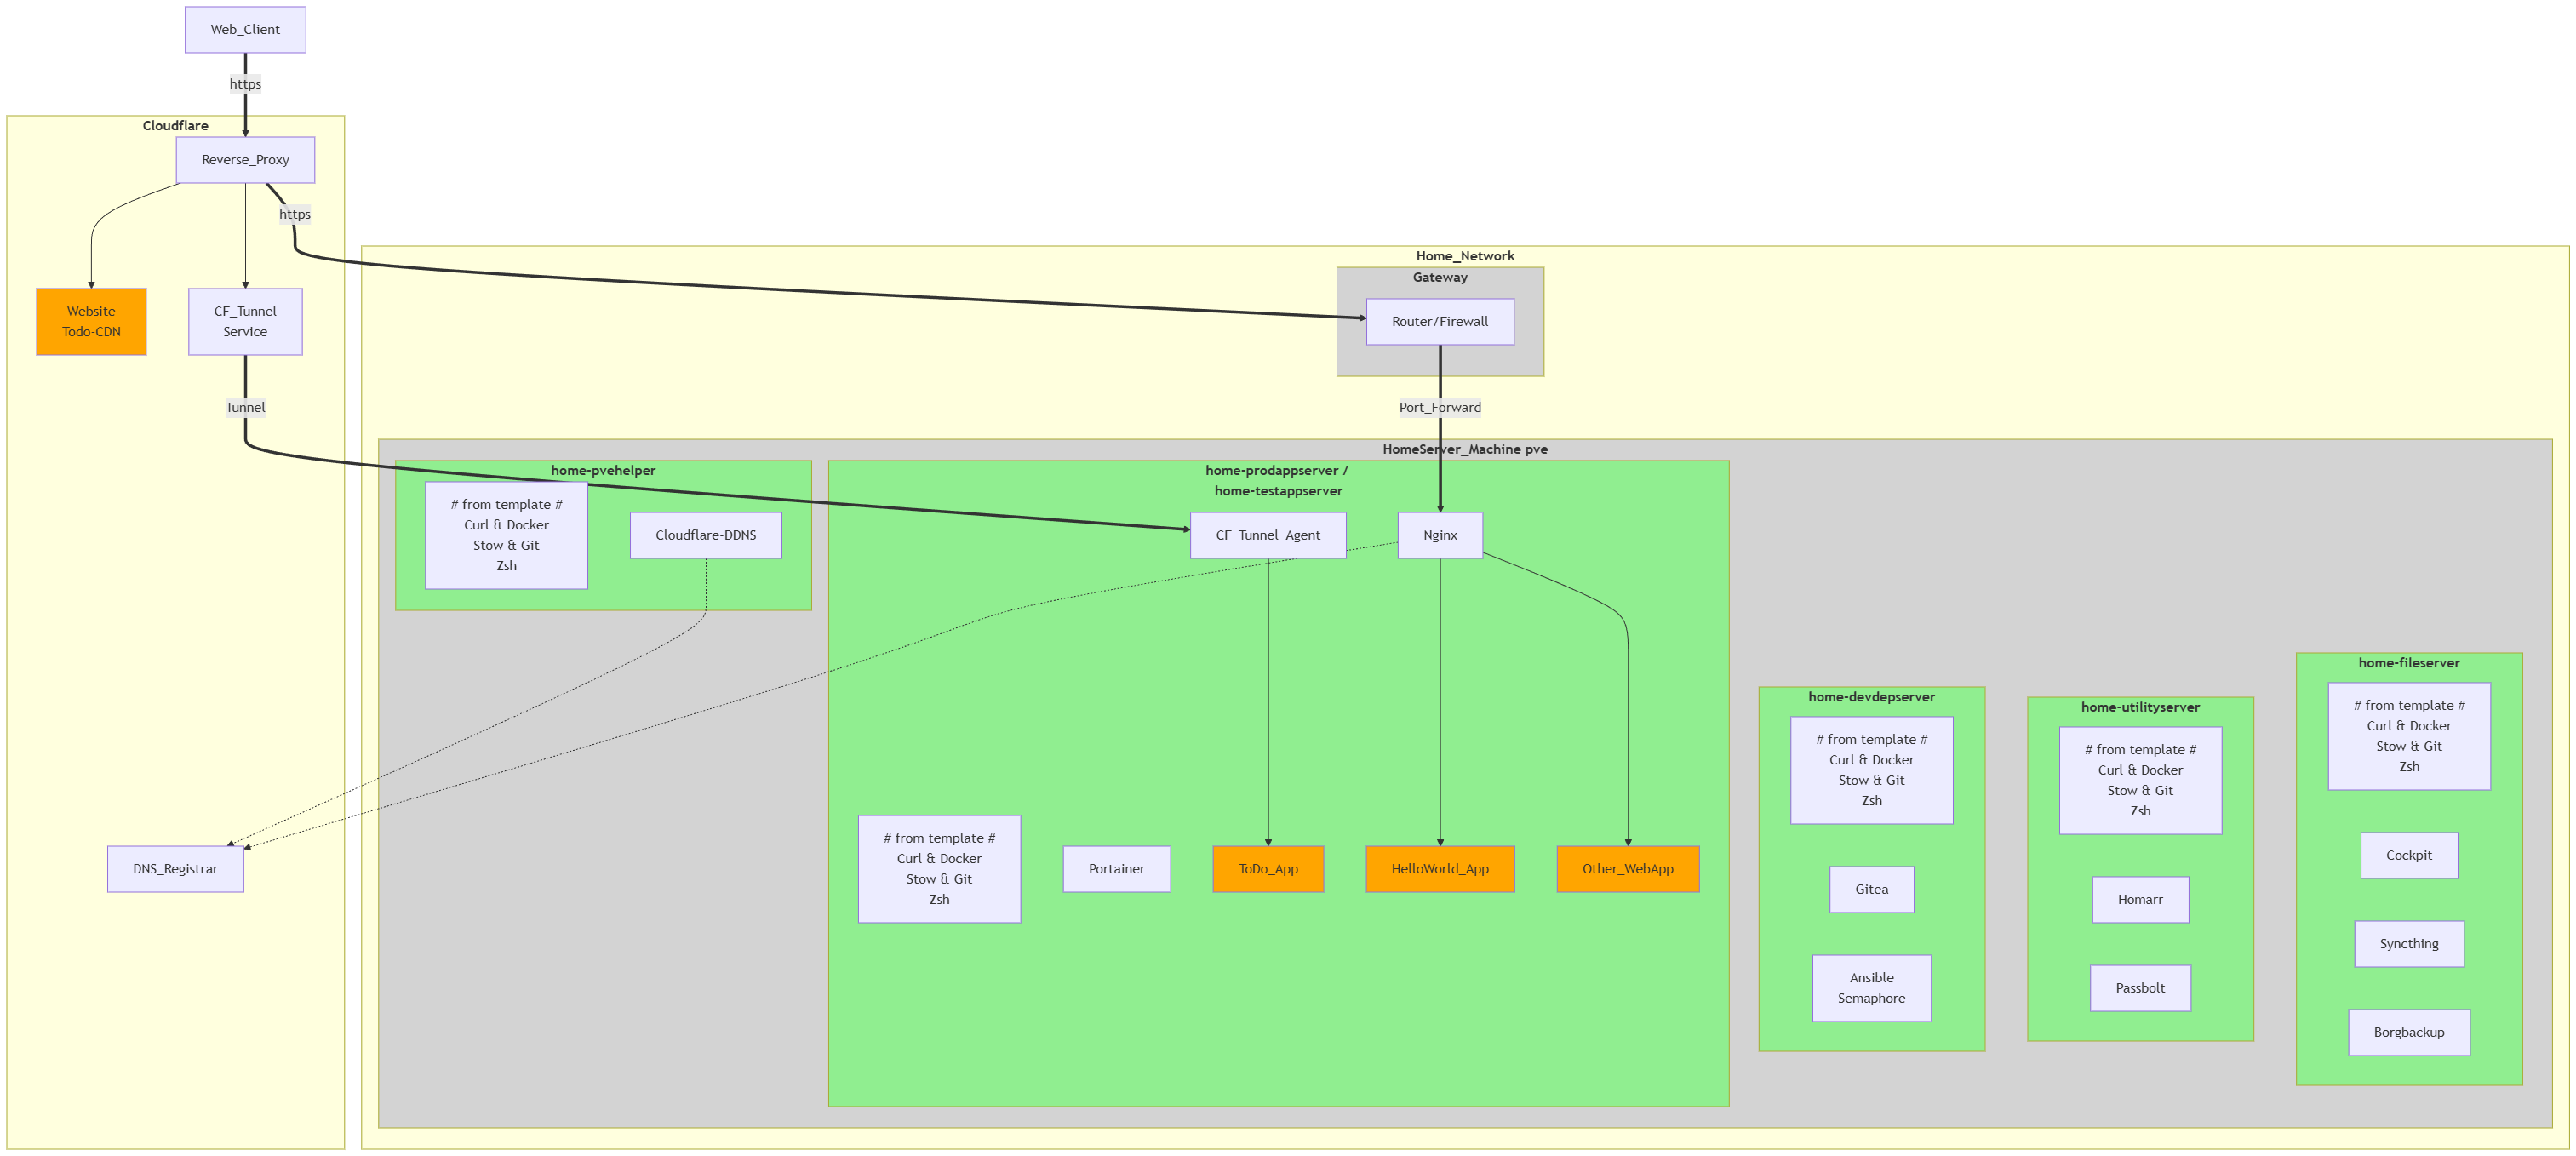
After this post, we’ll have the following situation:
With this project, I’m fully implementing all my ideas for the public website and a small virtual datacenter.
In the next project, I want to start further developing my ideas regarding a modern software factory:
application development tools, testing, security, CI/CD, OCI & Kubernetes, and app/infrastructure monitoring.
Result
1 - Developing minimal demo web application in Go
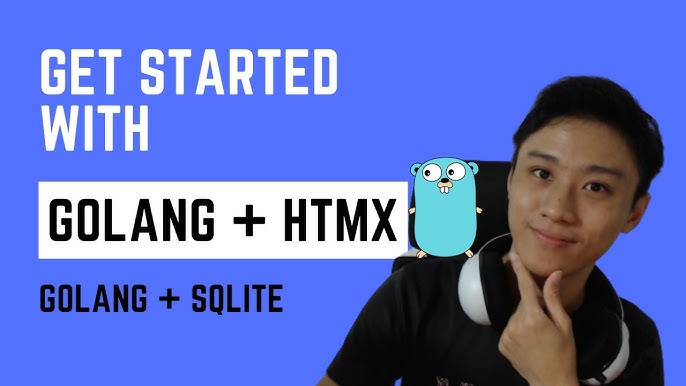
First, I created a HelloWorld application “demo_hello” (in the “example” folder in Gitea) in Golang.
I chose Golang as the programming language because it’s an easy high-performance language and ideally suited for running in containers/cloud environments.
I used this HelloWorld project to develop and test a “go_template” project (in the “util” folder in Gitea).
The go_template project will be used later to easily initiate development for all new Golang projects.
This template project contains the GitHub/Gite configurations, local Git configurations, and the Golang setup.
It also includes a simple makefile to simplify the compile, linting, and testing workflow through automation.
Other pipeline logic will be added later.
This way, a smooth development workflow was enforced right from the start.
See Overview for golang beginners
for more information.
??? TODO ???
Next, the “demo_todo” project (in the “app” folder in Gitea) was created with go_template.
The project structure was designed to contain not only Golang source code,
but also Golang test code, SQL script files, pipeline specifications, etc.
Next, I created an SQLite database with SQL scripts for creating DB objects and test data.
SQLite is the most widely used database in the world and runs on all operating systems.
It is an SQLite database that supports all ACID features (such as transactions).
It is free, highly performant (in-process), and easy to use/manage (all data is written to a single file).
Sqlite readers never block other readers or writers, and writers never block readers but do block other writers.
I will also use an SQLite database in Kubernetes in later projects (with horizontal scaling and backup),
and perform performance tests on it.
After creating the database, an initial version of the web application was developed.
This only displayed the database contents as todo rows in a table on the screen.
For this, the standard HTTP library and the templ library in Go were used.
To access the database, I used the sqlc tool,
which generates the db-access code in Golang from a text file containing SQL and specifications.
For the web presentation, I used the already familiar tailwind CSS technology.
Finally, web screens were created to add or remove a todo line, or to change todo details.
For this, I used AlpineJS and DaisyUI as additional front-end technologies.
AlpineJS is a small JavaScript library that adds new attributes to existing HTML elements.
AlpineJS is a small JavaScript library that adds new attributes to existing HTML elements.
This allows code to be executed in the browser without JavaScript programming,
for example, for form validations or communication with backend server code.
DaisyUI is a UI component library based entirely on Tailwind CSS,
which allows you to create more beautiful web interfaces faster.
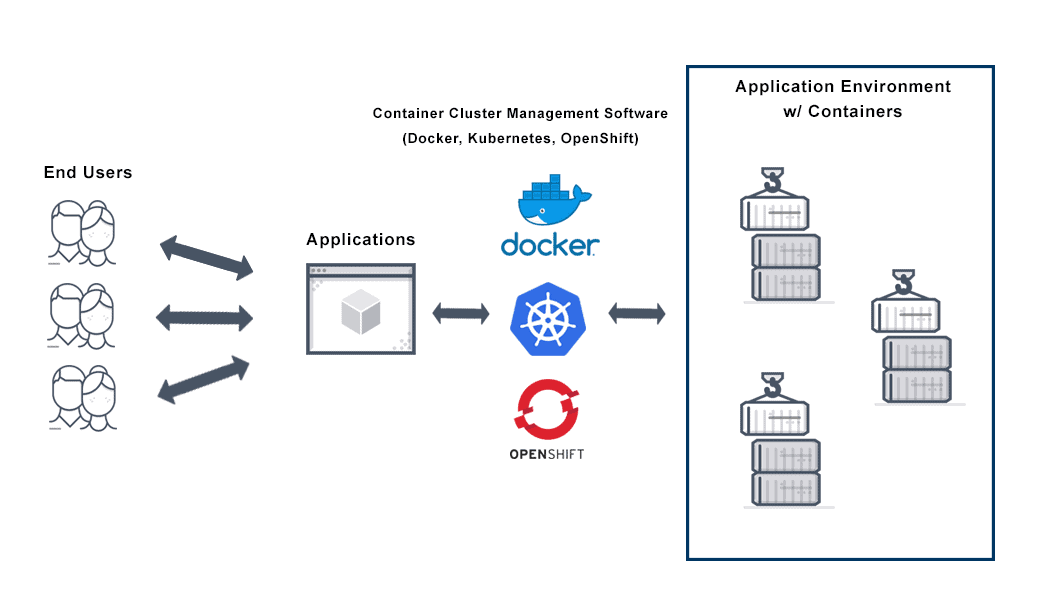
2 - Containerize web application and deploy to application server
??? TODO ???
build van container image met Alpine of Distroless base image (via Docker of Podman)
3 - Making self hosted web application publicly accessible
The ToDo web application is hosted on my home network and isn’t readily accessible over the internet.
To provide public access, I first learned a lot about networking and created an overview.
See Overview of network technology and middleware
for more information.
In this overview you will find:
- Network technologies
- Network middleware to support websites and web applications
- Products to access applications in your home network from the Internet
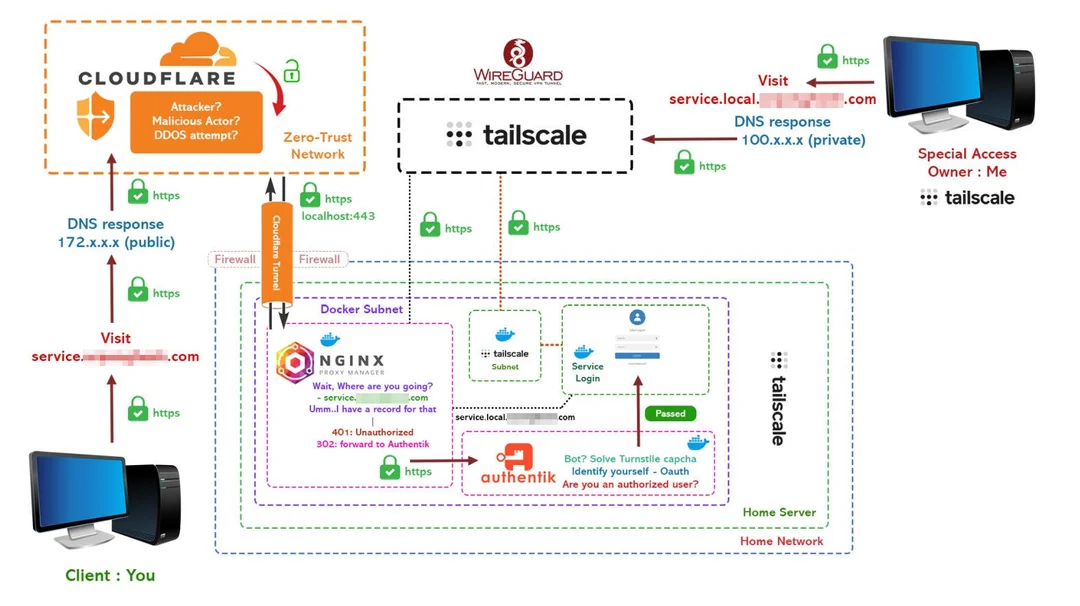
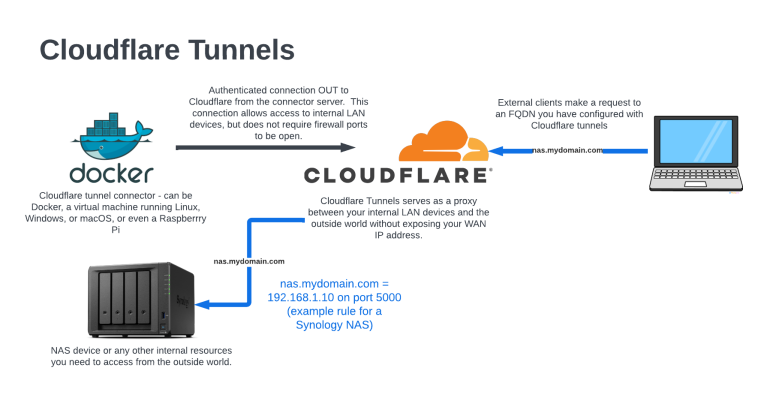
I ultimately chose to use Cloudflare Tunneling,
because I already had a domain name and a (free) Cloudflare account.
All I needed to do was create and configure a Cloudflare connector on my LAN.
I used Docker to install the connector.
My ToDo application is now accessible via my public website on Cloudflare.
Cloudflare’s CDN functionality can be used to retrieve static web resources for web applications.
This allows this to be done much more efficiently and on the edge.
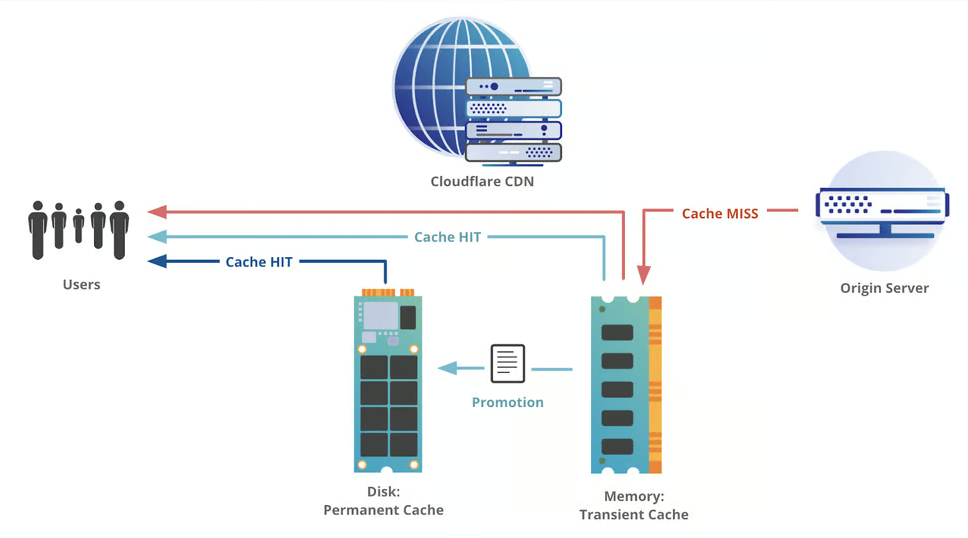
Therefore, I used this CDN capability for the ToDo application, resulting in the following architecture:
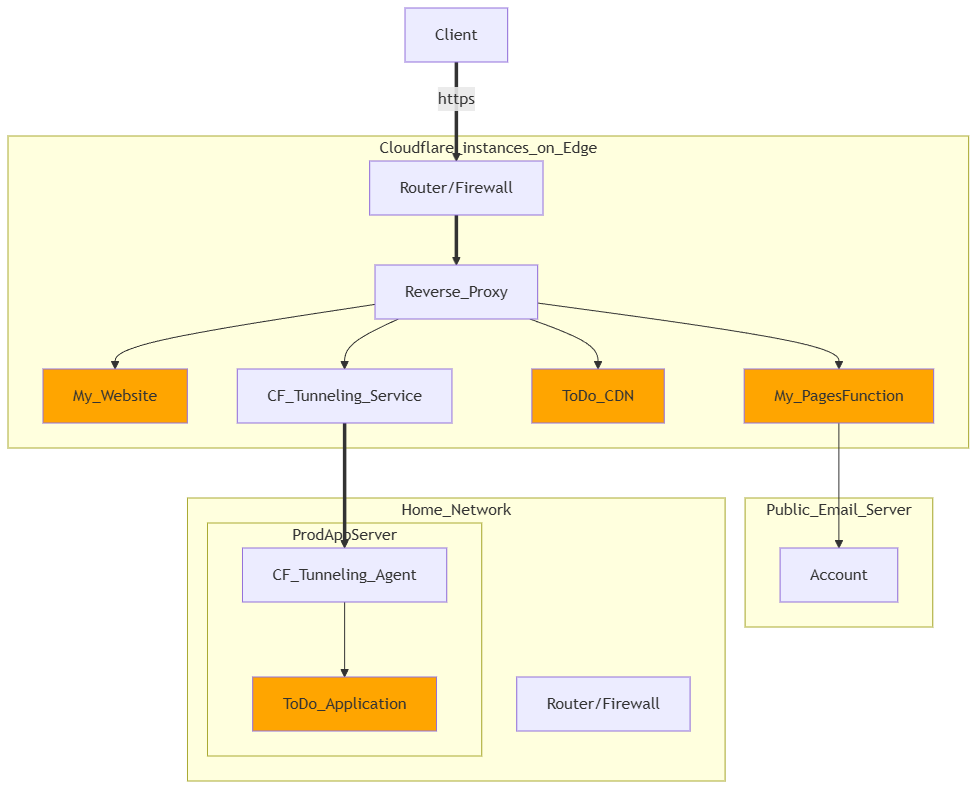
This image was created with “Mermaid” software.
I used “Markdown Preview Mermaid Support” and “markdownlint” as VSCode extensions.
In previous projects, I already used “PlantUML” and “Drawio” in VSCode to create diagrams.
Mermaid can only create simpler diagrams than PlantUML,
but the renderer is already included in GitLab, GitHub, and Gitea.
So in this section I installed the Portainer and Cloudflare-Agent software on “home-testappserver” and “home-prodappserver”.
4 - Provide infrastructure to make other self-hosted web applications publicly accessible
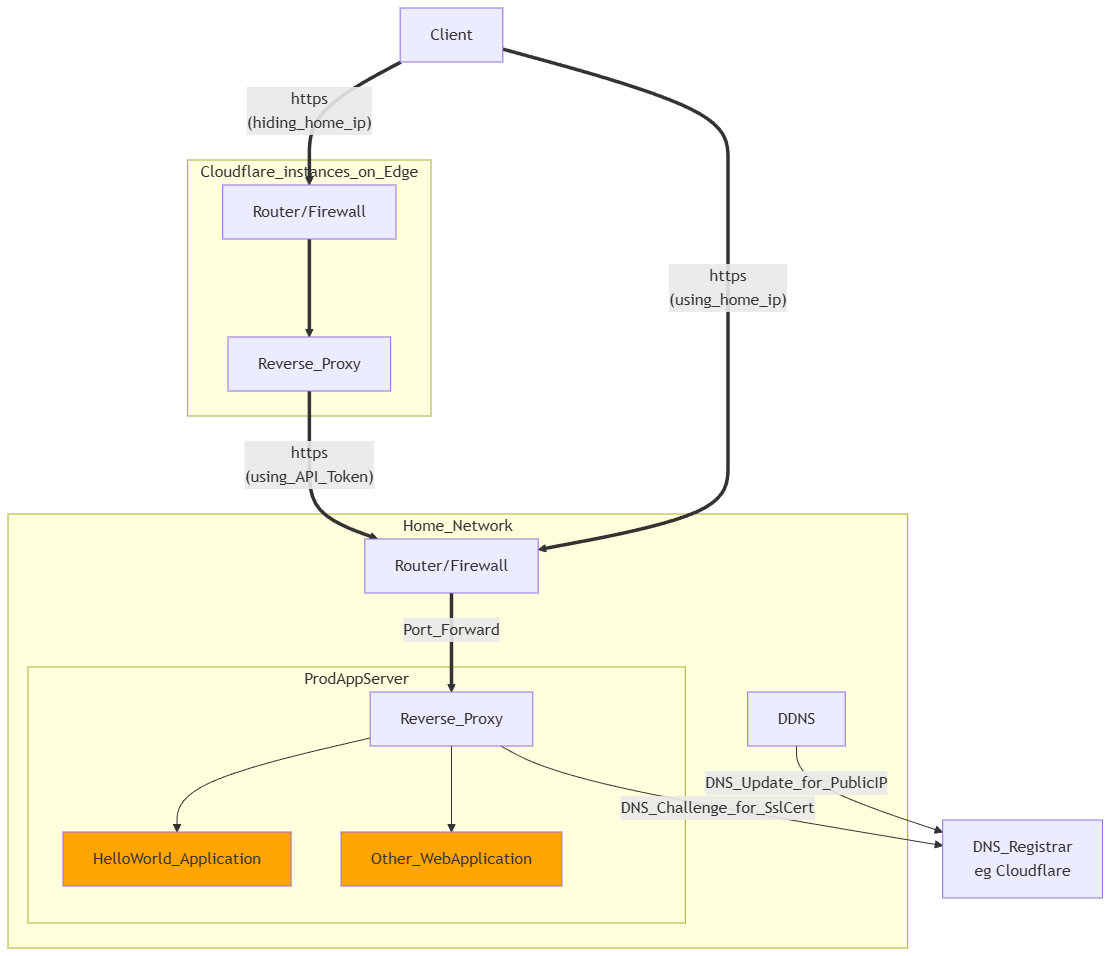
I will also later make self-hosted web applications public via https and port forwarding.
A client can then access my web application through my home WAN router,
which forwards the request via port forwarding to a reverse proxy (such as Nginx, Traefik, Caddy).
This reverse proxy will convert the https request to an http request,
and forward it to my self-hosted web application.
This does require a static public IP address, which could be resolved via DDNS.
It also requires a valid SSL certificate, which can be solved for free with the DNS Challenge.
The reverse proxy must support this.
This then results in the above architecture.
Next, I installed the Cloudflare-DDNS software on the Proxmox node,
and Traefik software alongside Portainer and Cloudflare-Agent on “home-testappserver” and “home-prodappserver”.
To test this, I made the “HelloWorld” application publicly available in this way.
I installed and used Traefik as a reverse proxy for this.
Because I want to work as securely as possible,
I used Cloudflare to hide my own public IP address.
This way, I can also make applications temporarily available,
so that other developers can easily test them, for example.